ESP32支援MicroPython, 將韌體燒寫進去ESP32, 就可在ESP32執行py程式.
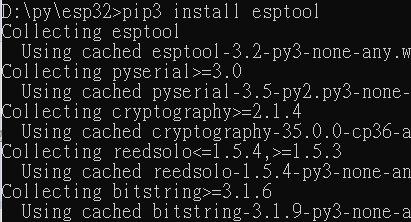
ESP32燒寫套件 esptool
指令: pip3 install esptool
(在非虛擬環境下建立, 與切換的資料夾無關, 都會安裝在一開始python安裝的路徑下)

在原始python安裝目錄下的scripts資料夾, 會新增esptool.exe.

檢視相關指令可執行esptool.exe


讀取Chip ID
esptool.exe --chip esp32 --port COM3 chip_id
COM3是ESP32硬體通訊位置


清除ESP32程式
esptool.exe --chip esp32 --port COM3 erase_flash
ESP32非一鍵下載版本需按下REST Pin才會下載, 強烈建議先在Arduino IDE下操作ESP32的燒錄流程.

安裝MricoPython
1. 下載micropython韌體, 將檔案放置在你的專案資料夾.

2. 在同層目錄下, 執行安裝指令.
esptool.exe --chip esp32 --port COM3 --baud 460800 write_flash -z 0x1000 esp32-20210902-v1.17.bin

通訊連接
使用mobaXterm進行通訊連接
Open COM Port後, 若無顯示訊息需按下ESP32 RST Pin.

REPL 基本操作
REPL為主要功能的縮寫
Read
Evaluate
Print
Loop
基本操作
Ctrl+D : 系統重置Soft-Restart
Ctrl+C : 中斷目前執行的程序
Ctrl+E : 進入Code Paste Mode, 可以直接將多行的一小段程式貼上執行.
進入Code paste mode

貼上執行碼

按下Ctrl+D執行

|
CTRL-A -- on a blank line, enter raw REPL mode |
-------------------------------------------------------------------------------
Development environment
Hardware: NodeMCU ESP-32S
Firmware: MicroPython esp32-20210902-v1.17.bin
Python IDE: PyCharm
Communication tool: mobaXterm
-------------------------------------------------------------------------------
參考
https://jimirobot.tw/esp32-micropython-tutorial-micropython-repl-104/


 留言列表
留言列表

